Showing posts with label DIY toys. Show all posts

Tuesday, October 9, 2012

DIY kitchen set

One of my favorite toys when I was a little girl was my kitchen set. I played with it for a very long time. It was simple, not a lot of bells and whistles but it entertained my sisters and I for many years!

I've been looking for a solid wood, high quality kitchen set for my daughter. But, it's just not in the budget right now. Plus, she's only 15 months so I can't really justify spending that kind of money when she's just as entertained by a box and a spoon.

I have been collecting felt, cardboard and wooden fake food over the past few months and I wanted to store it in a fun way.

DING! That light bulb went off as I looked at a cardboard box I had laying in the garage. I decided I was going to transform it into a "pantry" cabinet. Tools needed: knife, scissors, packaging tape, yarn, wooden ball beads, paper towel roll and paint or markers for decorating.

This is what it started out as:
Its hard to tell but I cut across the box horizontally to form two doors. Then I taped the bottom panel to the bottom of the doors. 
So, with the bottom panel taped this is what it looks like on the inside.

I formed the shelf using a piece of cardboard taped to the middle. Without the "support beam" it wouldn't be strong enough to hold something. I just took a paper towel roll and cut three slits at the top and bottom. Then, folded the flaps back and taped to the bottom of the shelf and bottom of the box.


Next I made the little door handles
First, I poked a small hole in the door panel using a tooth pick and pushed a piece of string through the whole then tied a knot. Second,  I laced the wooden bead through and tied it off at the other end. Lastly, I taped the back knot to the box to keep it from wiggling around too much. Repeat on the other side, make sure you line up your holes.
Once you have your doors in place you are ready to decorate. We didn't have good paint on hand and I didn't really have time to get too fancy with it. I just used a flower sponge to stamp on some painted flowers. Then I put some little boxes inside and filled them and the shelves with our fake food. I added a felt cutting board and a bottle with colored water inside.
Here is a picture of her kitchen area all set up. It includes a pantry, mini kitchen from her Grandma and her baby waiting in its highchair to be fed. I placed the mini kitchen on a sturdy cardboard crate and covered it with a blanket. This way it is a more functional height and baby G likes to climb up there to look out the window or sit and feed her baby on there. :)
This took about an hour. It was so fun :) Cant wait to see what she thinks about it in the morning!!


What toys have you made using a box??

Saturday, October 6, 2012

$6 Autumn Sensory Bin

AAA the weather is getting crispy...football, pumpkin spice lattes, sweat shirts...Its beginning to feel like fall here in southern California (despite the random days when its 90+degrees still)

I wanted to make a fun Autumn themed sensory bin as a gift for our 3year old friend. I also wanted to make one for our daughter.

I hit up the Dollar Store for some ideas. They had some shoe box sized bins with lids which I used for the gift. But, we have a great container at home for ours. Here is a picture of the supplies I bought costing in total $6
Wood chips, a small wreath, a bundle of leave, a pot of sunflower, a small pot of pumpkins/squash/pine cones, some kind of decorative branch thing (no idea what this is).

I used wire clippers to cut off the flowers, leaves, small pine cones, pumpkins and squash. I dumped the wood chips in and spread around the loot.


You can add things you find on nature walks to the bin over the next few weeks. We added two large pine cones!

These things are so great for young children. Its a way for them to explore things in nature learning about color, size, texture, weight, and smells (sometimes tastes).

Hope you enjoy!! Happy Autumn

Tuesday, October 2, 2012

DIY Light box

Here is fun way to engage your little people in a visual learning experience. Make your own light box!

To do this on a budget all you need is a plastic bin with a clear top. I used a Sterelite bin from Walmart.

I lined the inside walls of the bin with a heavy duty foil. On the inside of the lid, I taped wax paper. The wax paper acts as a light filter.

Then, I put white Christmas lights inside. You can also use the white tube lights.

 The closure on our bin snaps on the sides but allows enough room for the cord to still come out. You may need to drill a small hole to feed the cord through to the outlet depending on your bin.

Turn off the lights and. Place toys which allow light to pass through. You can work on things like building, stacking, sorting and exploring.
Be careful to watch for the heat build up inside your container....you may want to drill or poke a few holes in the back of the bin to allow some air to pass through. Do not make them too big because the light will shine through and ruin the effect. Enjoy! :)

Thursday, September 20, 2012

Sensory Books

I'm working with a girl on the Autism spectrum. She has some sensory processing and modulation difficulties. She also has a difficult time with communication. Her mother and I worked together and came up with a list of 15 strategies that seem to help her stay calm, focused and cope with frustrations. I wanted to share how a way we organized them so that Katie is able access to them.

We made a "Sensory Book" for home. (Ideally we will make one specific for school too).
In order to make one for your child, you will need the following items.

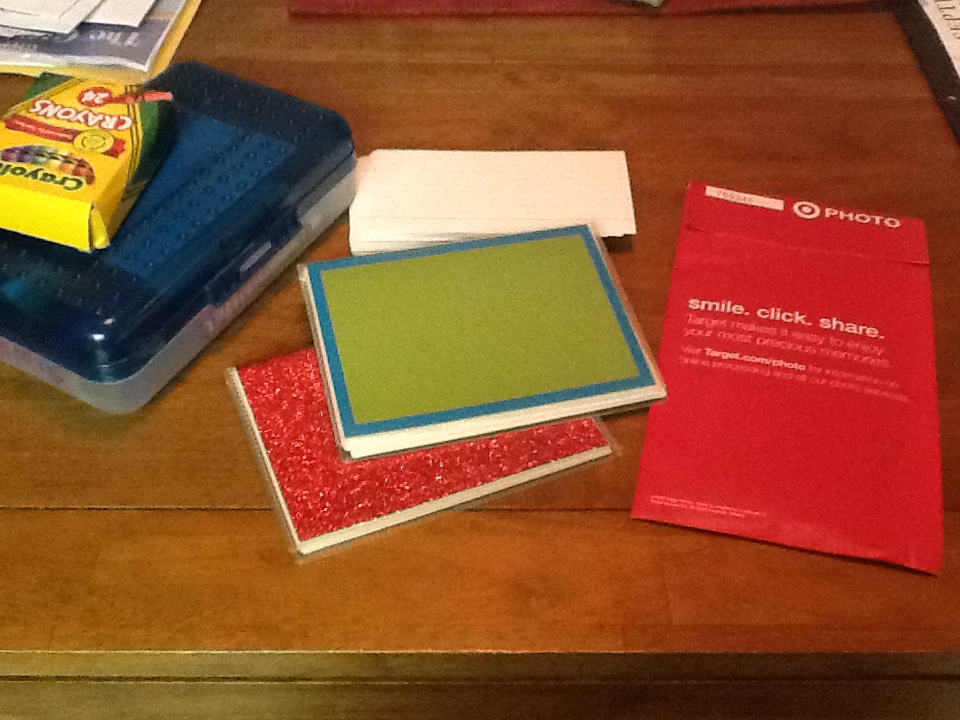
1) 4x6 Photos of your child engaged in the particular sensory activity
 2) A photo album ($2 Target)
3) Note cards
4) Markers/pens
 
I made this book so that Katie can use it to help communicate her needs. Because she is able to read I made sure that the language used in the book was age appropriate. I used words and labels in pictures that she was familiar with. I started the book with a brief introduction for the adults in Katie's life.
As pictures get placed into the book, a label for the activity it given on the opposite page. Then a brief description of the activity is given for the adult.
I'd like to note, every individual child has their own specific sensory needs. These needs can change depending on the environment and mood of the child. Its very important that we don't generalize sensory activities and think just because they work for one child it means they will work for others. Consulting with an occupational therapist is always best so you can determine your child's specific sensory needs.

I also thought this book would be a great idea for the child who gives you that age old phrase "I'm bored".   You could call the book "Busy Book Ideas". Document pictures of fun things your child can be doing. If they can read, write a list of supplies needed for the activity or a description of how to play the game. Having the visual cue of the activity may motivate the child to engage.

Hope you found this helpful and/or inspiring!

Monday, September 10, 2012

Turn your condiment bottles into toys

We all know babies love rattles and there are plenty on the market. However, you can make your own with just a few things laying around your house and I promise your baby or toddler will love these fun noise makers all the same (if not more).  The best condiment bottles to use are the clear plastic ones with lids that can screw on and off. The pop up tops are ok but you want to make sure you're able to super glue it shut. Start by cleaning your empty bottle with warm soapy so that all the food is out. Then soak in warm soapy water for a few hours to soften the label for easier peeling off. Ideally you do not want any paper left on the bottle. Then, you fill each one of your bottles with some kind of small objects that will make noise when shaken. Here are some examples of what we use:
The bottle on the left has blue water beads inside. These are found in the floral department of any craft store. They are very tiny when dry but when you add water they expand so you only need very little or else your bottle will be full. They dont really make noise but visually they are really cool...you could add water to it to watch them swish around. If you add water it can make the bottle heavy for little ones to pick up so do so based on what your child is able to shake.
The middle bottle has dry beans, sparkly puff balls and pipe cleaners. Again, visually stimulating and makes a cool noise. The one on the right is filled with miscellaneous craft buttons. I got a big bag of these from Michaels. Coins, buttons, pebbles, small bells, nails, golf tees, or rice are all other options to add to your DIY rattle noise makers. Have fun making music, learning about cause and effect, working on upper body coordination and visually exploring these cool looking noise makers!

Saturday, September 8, 2012

Costco has great free toys!

I've learned the best toys are often the simplest. We can spend so much money on kid toys, especially these days with all the fancy electronics. Marketing has made us feel our kids will miss out or will learn more if we buy them the best technology has to offer. But, research has shown simple (non-battery operated) open ended toys that encourage imagination really are the best way to help those young brains develop. Many of these toys can be made with a trip to Costco using THE CARDBOARD BOXES!!! My daughter has had more fun playing with the crates and boxes we find at Costco than any other store bought toy. Not only do these boxes encourage her to develop gross motor skills but they also spark imagination and will continue to do so as she gets older. Here are some of the ways we use our cardboard:
Open up cardboard boxes, duct tape them together and use a knife to cut out a window. Its a tunnel or fort.
Cut holes on the top and place near a window for the light to shine through.
Hi Mom! Surprise toys can be lowered into the box from the "sun roof". (no we dont typically let her play with cords)
As long as your little ones aren't too heavy you can cover those half size crates with a blanket and make your baby a little "stage" we put ours against the wall and it turns into a little step. This is great for working on motor skills and a fun place for baby to go and sit.
These light weight boxes are great for carrying, sitting on or in, climbing on, pushing, putting toys into and out of...the possibilities are endless. Please supervise if you have little ones because before you know they will be doing something like this----->
What fun creations can you make with recycled boxes?!

Tuesday, September 4, 2012

DIY Sensory Board

I'm so excited to share with everyone how we made our sensory board. What is a sensory board you might ask?? It is basically a board in which you attach objects to be explored by ones own senses(typically the tactile or touch sense). You can make it as simple or complex as you wish. There is no right or wrong way to do it. You can tailor them to infants or curious older toddlers depending on what you place on the board. We started our sensory board when my daughter was around 6months. She was sitting up and really into touching soft things and LOVED ribbon! She is now 14 months and I've added a few things. I decided to use zipties so that I can change or remove things as needed. I didn't want to use tools and wanted to be as economical as possible. Here is what I used:

A peg board. This is 2ftx4ft and bought at Homedepot
Then, its up to your creativity for adding stuff. Since I wanted to do this as cheap as possible, I made a trip to our local Dollar Store. I also stopped at the Carpet Store to pick up free scraps of carpet.
In this picture we have a green car washing sponge, round adhesive mirror, carpet squares with super glued glass gems making a border, a white duster with the handle removed, a purple scrubbing sponge for dishes, a wooden xylophone with wand attached to the board by pipe cleaner.
In this picture I have pony beads laced on pipe cleaners. The pony beads can be moved up and down the pipe cleaner. I also hot glue gunned three mesh drain covers. These are fun to feel and can be squeezed by little fingers. I glued some fake grass from the carpet store and attached a twistable fake flower. I also attached a silk flower to compare textures. The round circular thing is a plastic lid I found laying around the house. I glued googly eyes on it for color recognition and to add a bumpy texture. I also added some fun beads to pull and feel. They make a cool noise when rubbed together.
In this part, I added a purple tambourine (which I should take off a ziptie so that it is easier to generate noise from). Blue square carpet in two color tones. A LED touch light (bought at Target around $5-my most expensive item). The orange adhesive feet are for the bottom of your bathtub...they are textured...kind rough/scratchy. I added three ropes which were very curly at first, I have hopes of teaching my daughter how to braid or tie a knot using these ;). We cant forget the CURLY RIBBON!! Lastly, three hooks which are attached with an adhesive backing. We use the hooks to hang various treasures on. I'm going to walk you through how to attach objects to your board:
You need zipties and an object. This is a recycled container from baby puff snacks. Perfect size for the board and easy to attach with zipties. I also have a fun feather duster I'm going to place in the container. My 14month old loves to put things into and out of containers lately.
First, come at the board from the back and lace the ziptie through one of the holes. If your container or object is large (as is the case with this) you will have to attached two zipties together in order for it to be secure.
Secure your object to the board using the ziptie. Connect and tighten from the back of the board
Make sure you pull the ziptie tight enough so that the object will not be pulled out by grabby hands (toddlers are freakishly strong). I like to trim the excess off the tie so the board lays flat against the wall or floor.
The above picture is of a recycled yogurt cup. Since it is wide, I poked two holes in the side and laced my ziptie through it that way. This is a fun little container for toddlers to place "treasures" inside.
Or, you can hide little treasures for your toddler to discover. Today I hid little plastic shapes inside. You can place a corresponding shape sorter next to your board and invite some shape sorting to happen :) I place my board next to a full length mirror and like to hang little things like sunglasses, bead necklaces, bangle bracelets, hats and puppets on the hooks for dress up and pretend play as well. SAFETY NOTE: infants and toddlers PULL so the best thing to do is to secure this to your wall or wedge a piece of furniture on either side to prevent it from falling down on top of them. Always use this with supervision. You can also play with this flat on the floor but your containers might get smashed if you have a walker or adventurous crawler.
HAVE FUN!!!

Sorry my close up photos are not facing the correct way...my computer is having some kind of glitch and wont save the rotated photos correctly :(